
This post is semi-incomplete, I need to finish this
The linkages you need to pop off are circled in red, and the return line is circled in blue right in the center of the following image:
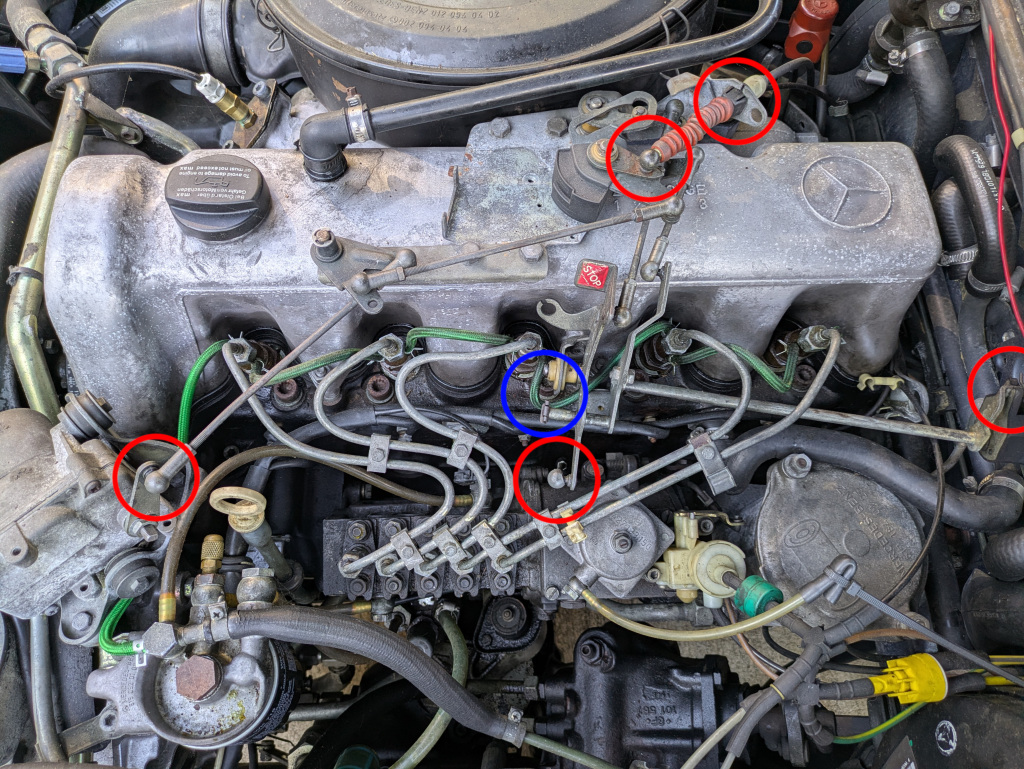
Once you have removed all of those, you can remove the 4 nuts that hold the valve cover on, and wiggle the valve cover up and off the engine.
Then you can adjust the valves in sequence as shown in this chart:
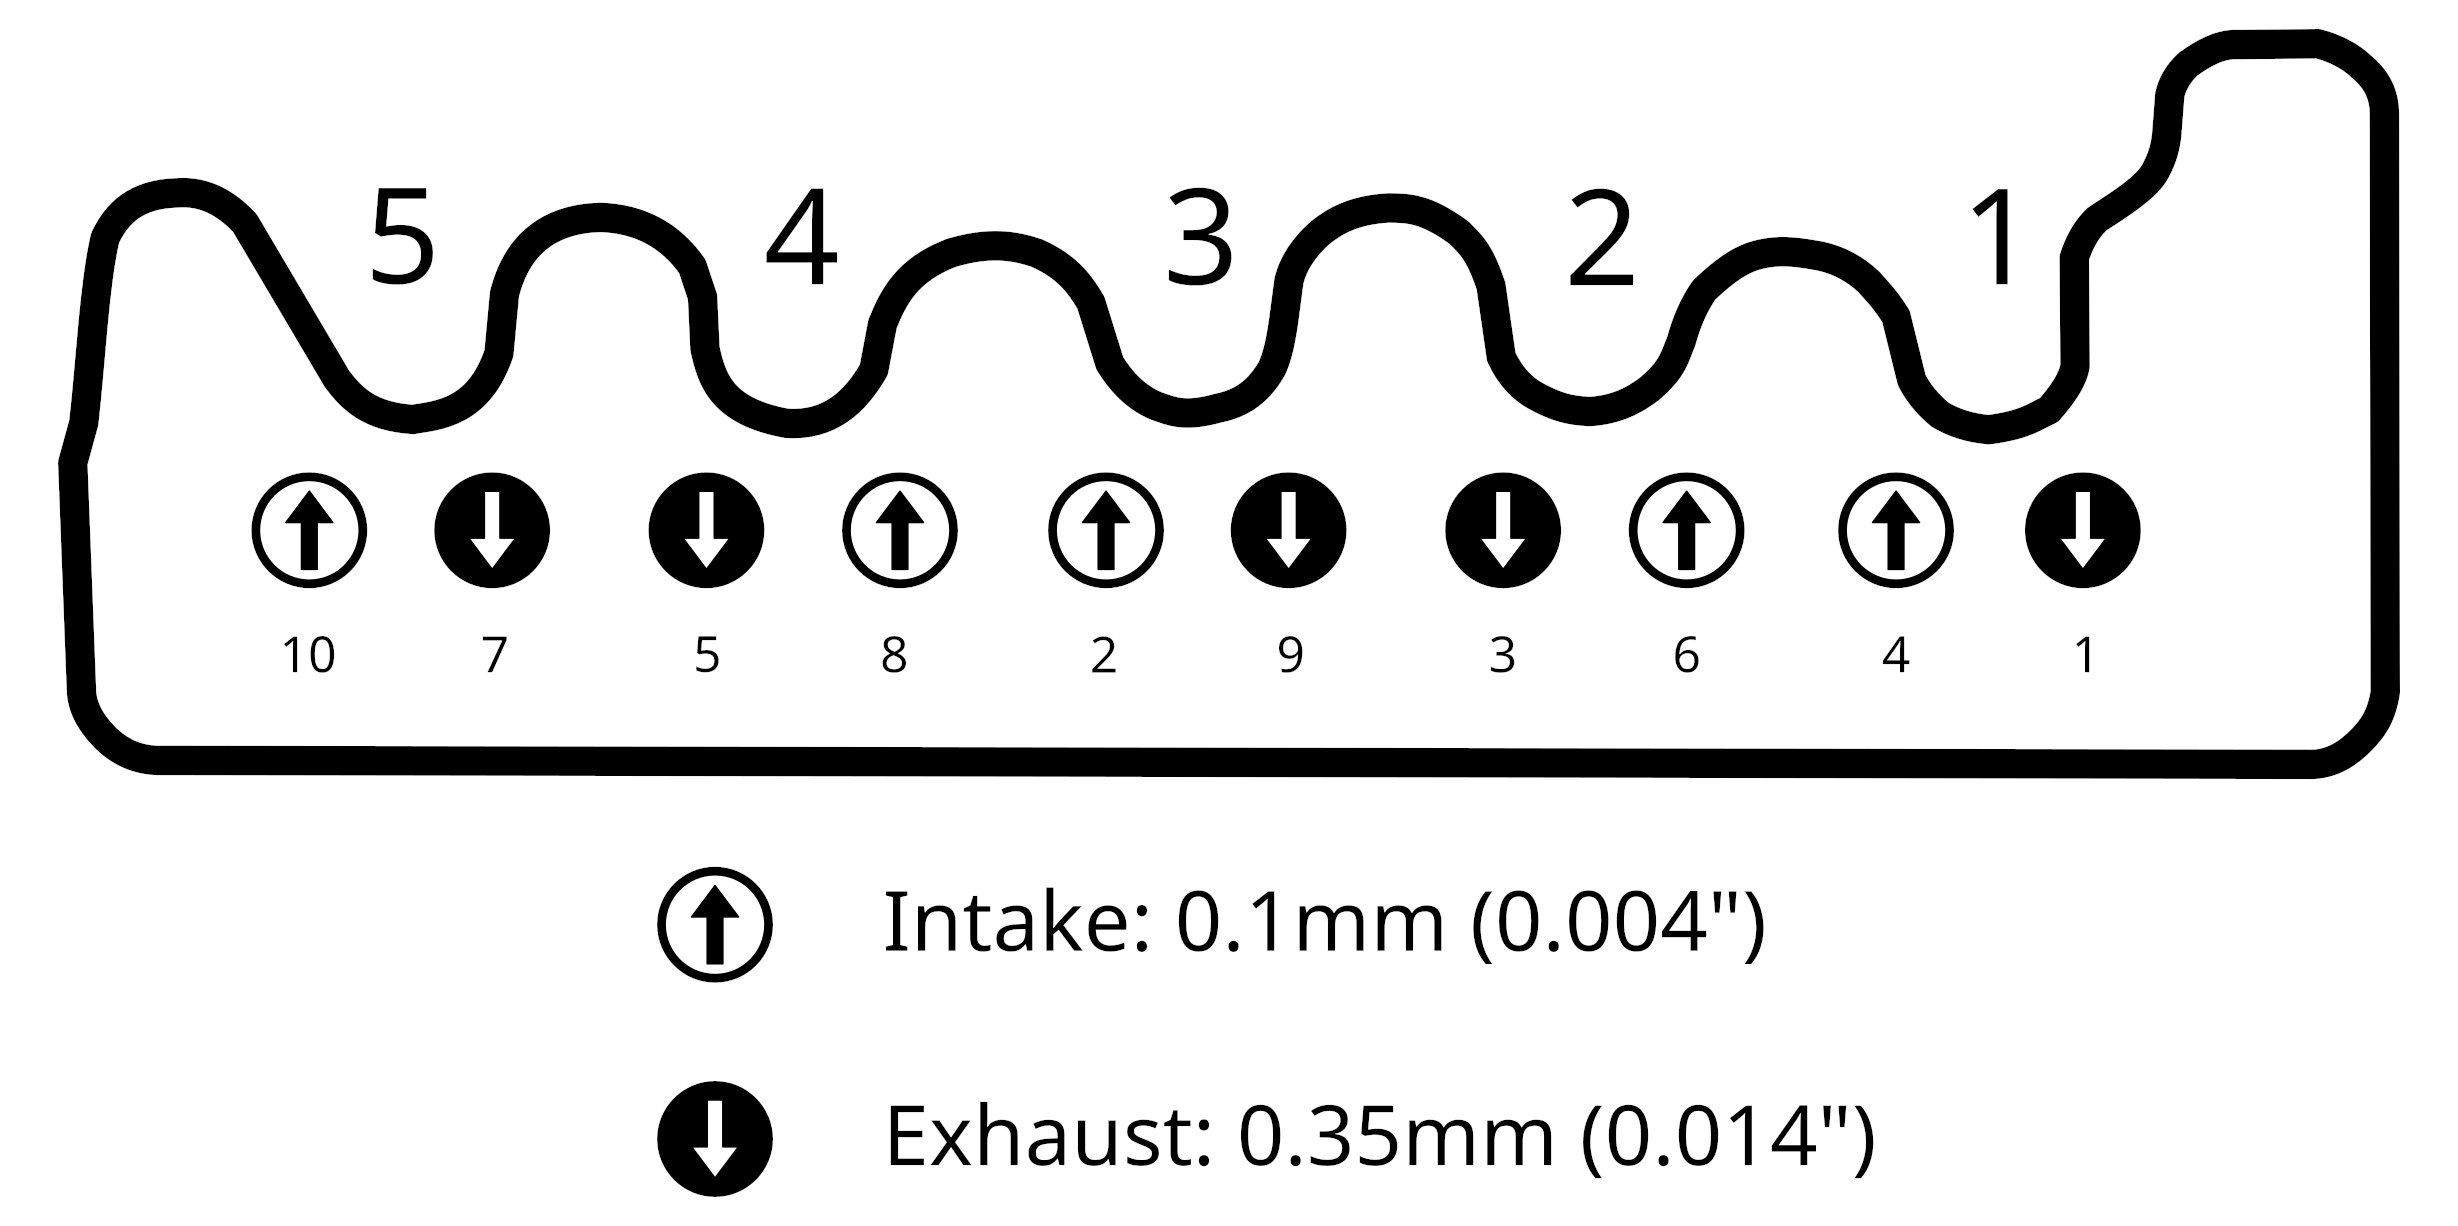
As a note, you don’t need to start with #1, you can start wherever your engine is currently turned to be in sequence for, just ensure you check and adjust all the valves, print the chart out and mark off each one with a permanent marker or your oily finger while you’re doing the adjustments.
Things you need to accomplish this:
| Part | Why you need it |
|---|---|
| Chart | Makes it easier to have reference |
| 14mm wrenches | Modify these to adjust the valves |
| Torch | For heating and bending wrenches |
| Feeler gauges | Checking and adjusting valve clearances |
| Valve cover gasket | In case yours is torn or hardened |